Design of indonesia house 3

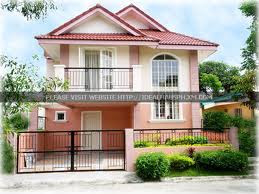
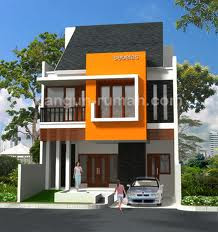
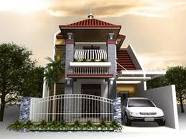
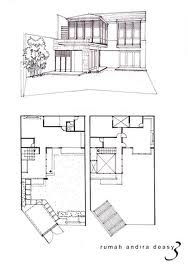
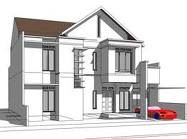
In design of indonesia house 3, i will share about sketch and perspective of house that has been built in Indonesia, klipang street, middle java. It is in the same place as design of Indonesia house 1 but in a different model. Take it as referency for your own design house or you can use it to build your house. Have fun and see you..


SKETCH
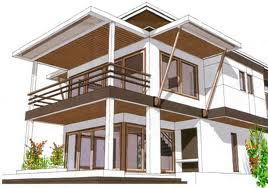
I think when you want to design a house, you have to design the sketch for the first time. Then you can develop it from the sketch as you want. In this posting i share you the sketch that i made after i hunted the information of that house. See it, learn it, imagine the sketch that you want and draw it. Have fun...


PERSPECTIVE
After you drawn the sketch, you will come in a more difficult step. You have to design the form of your house. Perspective is the form of your house in 3 dimension. In this step you need more consentration and good imagination. Usually for the beginner get more difficult. So i recommand that the beginner to look for some referency. In this posting i also share you a simple perspective that i made from the sketch. See it, learn it and practice. Show your imagination. Have fun and good luck.
read more

0 comments

Design of indonesia house 2

In design of indonesia house 2, i will share about sketch and perspective of house that has been built in Indonesia, klipang street, middle java. It is in the same place as design of Indonesia house 1 but in a different model. Take it as referency for your own design house or you can use it to build your house. Have fun and see you..


SKETCH
I think when you want to design a house, you have to design the sketch for the first time. Then you can develop it from the sketch as you want. In this posting i share you the sketch that i made after i hunted the information of that house. See it, learn it, imagine the sketch that you want and draw it. Have fun...


PERSPECTIVE
After you drawn the sketch, you will come in a more difficult step. You have to design the form of your house. Perspective is the form of your house in 3 dimension. In this step you need more consentration and good imagination. Usually for the beginner get more difficult. So i recommand that the beginner to look for some referency. In this posting i also share you a simple perspective that i made from the sketch. See it, learn it and practice. Show your imagination. Have fun and good luck.
read more

0 comments

House Design Styles

American Style


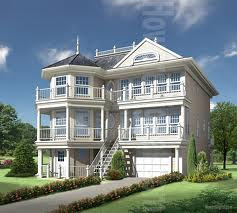
The new American house plan embraces the idea of uninterrupted flow and expansive style.
A reflection of American affluence and desire for elbow room, the New American-style home is big, inside and out. The New American house plan is all about uninterrupted flow: from kitchen to dining area to family room; from family room to deck; from master bedroom suite with walk-in closets to luxurious master baths with double sinks, separate shower and tub. It's a style as expansive and exuberant as the country in which it was created.


Architectural Features:
- Oversized windows let light stream into interior space
- Second-story interiors that often are open to below
- Massive two-story asymmetrical facades (often of brick or stucco)
- A roof made visually complex by contrasting peaks and heights
read more

0 comments

House Design Styles

American Style


The new American house plan embraces the idea of uninterrupted flow and expansive style.
A reflection of American affluence and desire for elbow room, the New American-style home is big, inside and out. The New American house plan is all about uninterrupted flow: from kitchen to dining area to family room; from family room to deck; from master bedroom suite with walk-in closets to luxurious master baths with double sinks, separate shower and tub. It's a style as expansive and exuberant as the country in which it was created.


Architectural Features:
- Oversized windows let light stream into interior space
- Second-story interiors that often are open to below
- Massive two-story asymmetrical facades (often of brick or stucco)
- A roof made visually complex by contrasting peaks and heights
read more

0 comments

Create a Private Boutique in the Bedroom


Create a "private boutique" to accommodate the collection clothes, bags, and accessories that accumulate. Boutique is a Walk In Closet.


Collection of clothing, bags, shoes, accessories, or teak can continue to grow. As a result, the wardrobe was not large enough to store. If you are like this, prepare a new storage solution. Walk in closet may be the solution.


A room, big or small to accommodate the various needs of work clothing is a simple definition of walk in closet. In it, various clothing, shoes, and accessories neatly organized on shelves. Presence can be equated with a mini-boutique.


Walk in closet is identical to the luxury lifestyle. The area needed to make it special. So that the size of space required is relatively large. For homes and small size are, the provision of extra land difficult.


In the house are large (more than 300m ²), walk in closet can be made in a special room on the side of the room. Yes, walk in closet with an identical storage space in clothing is the "extension" of the bedroom. Walk in closet is usually connected to the bedroom, bathroom, and even work space.


How about the size of the house are, under 300m ²? To such a house, not impossible to make walk in closet. Origin to be the placement and size walk in closet that will be created.


No need to create distinctive rooms, walk in closet can also be combined with the bedroom. Adjust the size with the need. Create cupboards and shelves in it functional. Take advantage of any small area. If possible, make the ceiling as a cupboard.


So that existence does not make a room feel small, made with transparent glass walls. Thus, the room divider rather soft. Create a regulation that neatly in the walk in closet. So that the "private boutique" You are not crowded and untidy.


One thing to remember, to make any in the house, always adjust to the needs. If it is not required, no need to make a walk in closet. Take advantage of the only land available to the needs of the more important.


Source : kompas


read more

0 comments

Design of indonesia house 1

In design of Indonesia house, i will show you (free without any charge) some design of houses that have been built in Indonesia by some developer accompany and also my design. I drawn the design (sketch and perspective) myself by using autocad program. I hope it can be referency for you to know about Indonesia houses and to build your house (if you like design of indonesia house). So enjoy it and have fun.
In design of indonesia house 1, i will share about sketch and perspective of house that has been built in Indonesia, klipang street, middle java. Maybe the perspective of house is not same as the real one, but in this blog i just want to share what i imagine when i saw the sketch of the house. Hope you can use it as referency when you want to build your own house or when you want to design yours. Ok have fun and always playing your imagination, don't stop it. See you..


SKETCH
I think when you want to design a house, you have to design the sketch for the first time. Then you can develop it from the sketch as you want. In this posting i share you the sketch that i made after i hunted the information of that house. See it, learn it, imagine the sketch that you want and draw it. Have fun...


PERSPECTIVE
After you drawn the sketch, you will come in a more difficult step. You have to design the form of your house. Perspective is the form of your house in 3 dimension. In this step you need more consentration and good imagination. Usually for the beginner get more difficult. So i recommand that the beginner to look for some referency. In this posting i also share you a simple perspective that i made from the sketch. See it, learn it and practice. Show your imagination. Have fun and good luck.
read more

0 comments

Layers and UCS | Autocad 3D

In this lesson, i will tell about how to make everything that we draw is under our control. Layers dan UCS are the topic today. As we know sometimes we will do some complicate home work that make our head get headache. For example when we want to draw a house, there are so many thing that we want to draw (window, door, bed room, roof, bath room, etc). So, to manage all of this we need some controling.

1. Layers
To make everything easy and simple to do, we have to manage what we want to draw by using layer properties manager. Just click layer properties manager (under command 'qnew') and you will find many command. Start it by clicking command 'new'. Named it and you can also choose the colour Of layer. As you choose the colour of layer, you have choosen the colour of drawing that you want to draw. For example: first you want to draw the bed room, click 'layer properties manager' then 'new'. Named it 'bed room' and choose 'white' then begin to draw. After finish it if you want to draw the door, click 'layer properties manager' then 'new', named it 'door' and choose 'brown' (i recomended you choose a different colour in each part of drawing) then begin to draw. When you are drawing and you lose your focus because so many lines and rectang from 'bed room', you can manage it by using 'layer properties manager'. Click the arrow in the right of layer properties manager, choose 'bed room' and click the picture of lamp. 'Bed room' is hidden. that's what happenned, so now you can contionue to draw 'door' without losing your focus again. When you want to see it again just click like before.


2. UCS
Sometimes in drawing we will meet a complicate problem. For example see in lesson 2 about slice. When we want to cut a thing by using command slice, we have to create an object with a different coordinat. In this case we need command 'ucs'. Look at the picture 2.4a, there is a rectang inside the box. To make rectang we need to change the coordinat. Write command 'ucs' in the command place and enter, then write 'n' (new) and enter, after that click 3 point (it means where we gonna put x,y,z is) in the box, then draw the rectang.

Ok that's all i want to share to you about autocad 3d. I hope you can enjoy this sharing and always keep practice...
see you...
read more

0 comments